
Since Laravel Cloud launched, the most consistent piece of feedback we have received has been about pricing predictability. A usage-based model is different from a flat-rate VPS (even if cheaper), and the uncertainty of not knowing your monthly bill upfront was a real barrier for many people.
We heard you and have since launched new features that give you real control over your bill. We want to make Laravel Cloud a viable solution for every developer. That includes using it as cost-effectively as possible. So here are five tips to help you save money on Laravel Cloud:
- Enable scale to zero on Flex compute.
- Set a spending limit on your organization.
- Use the usage page to catch costs early.
- Switch to managed queues to stop paying for idle workers.
- Share databases and caches across multiple apps.
To see them all in action, check out this video.
Enable Scale to Zero on Flex Compute
If your app is not getting traffic, you shouldn’t have to pay for compute. That is what scale to zero is for.
Previously, scale to zero on Flex compute was slow to wake up—about 10 seconds. That meant that any app with a real database or cache had to stay running 24/7.
The new Flex compute changes that. Compute, databases, and cache sleep and wake together 20 times faster, in under 500 milliseconds. Users won’t be able to tell your app was sleeping, but you will see the savings on your monthly bill.
Scale to zero makes it practical to run multiple apps, from staging environments and side projects to internal tools, without worrying about idle compute running up the tab. You can configure it per app from your environment settings.
Set a Spending Limit on Your Organization
Billing alerts tell you when you have already spent something. Spending limits prevent new spending from accumulating further.
You can set a hard monthly limit per organization in your Cloud dashboard. When that limit is reached, new resource provisioning stops. Existing operations finish normally, but nothing new spins up until you raise the limit.
Before reaching your spending limit, notifications fire at 50%, 80%, 90%, and 100% of your ceiling, so you have advance warning before the limit kicks in.
Combined with scale to zero's low idle costs and $5 in monthly credits for Starter, Growth, and Business plans, spending limits complete Laravel Cloud’s new approach to pricing predictability. You know your minimum, your likely range, and your hard ceiling before the month even starts.
Use the Usage Page to Catch Costs Early
Your Laravel Cloud usage page provides an organization-level view of spend and resource usage, refreshed hourly. That means you do not have to wait for the invoice to find out that something is running higher than expected.
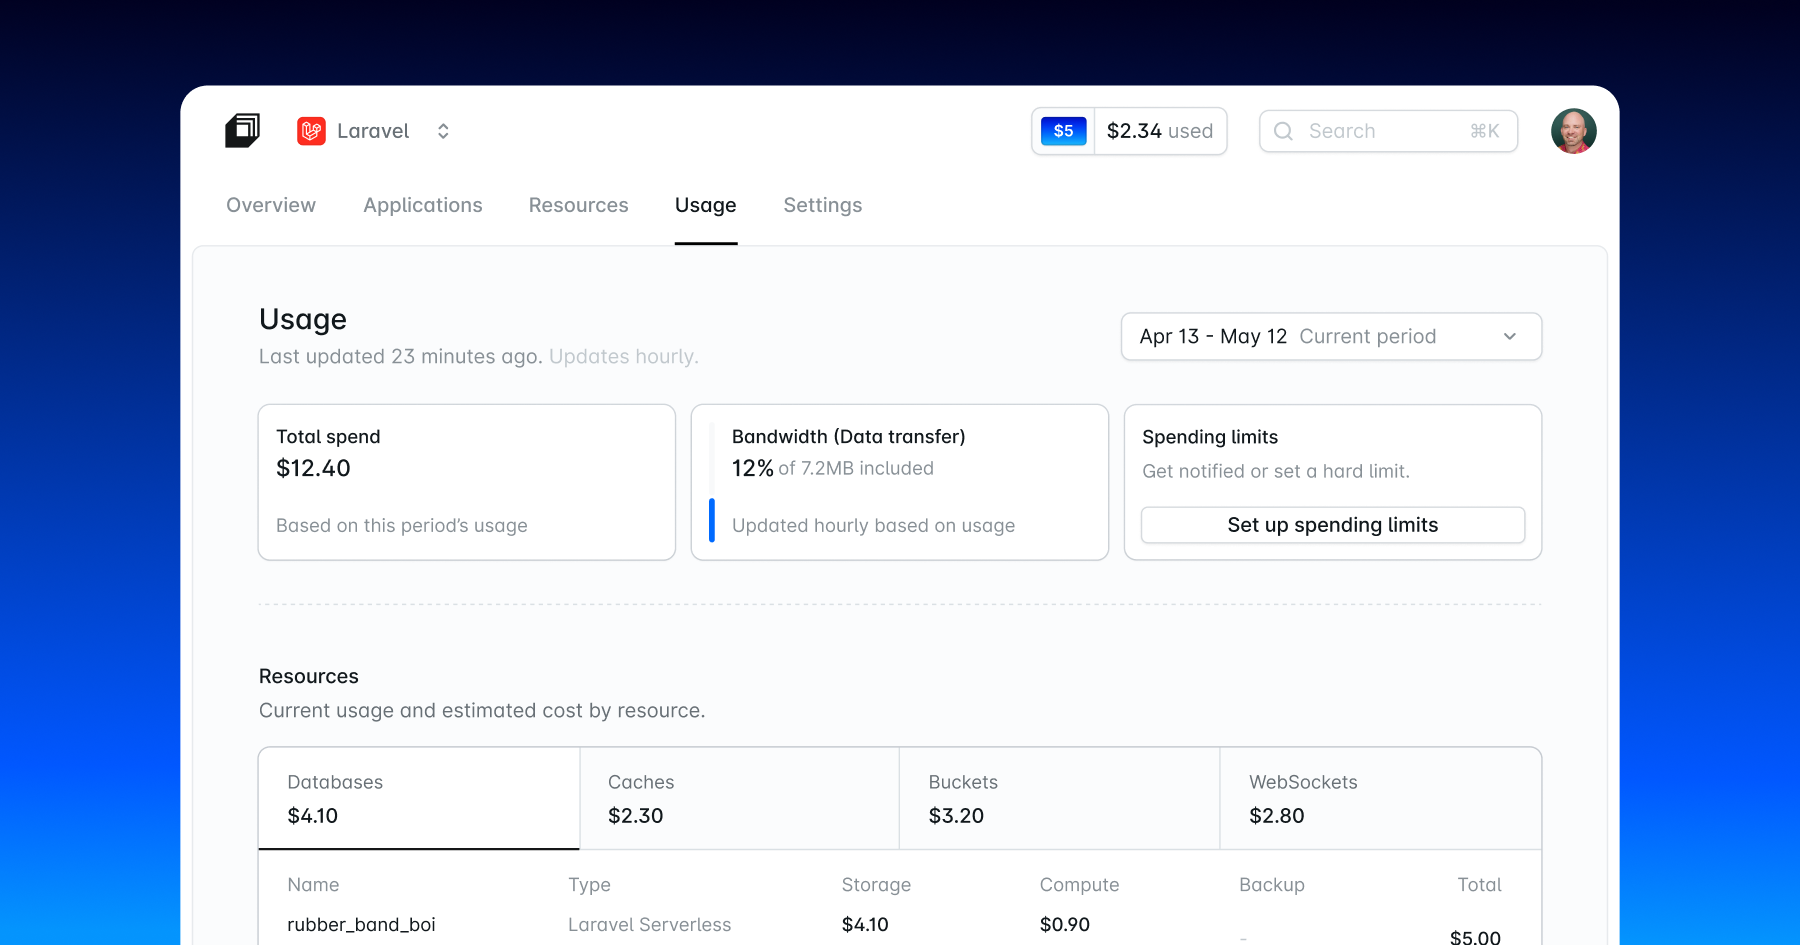
At the top, you see your current spend, bandwidth usage, credits, and any active spending limit. Below that, the Resources section breaks down costs by category: databases, caches, buckets, and WebSockets, each with a subtotal.
The Applications section is where it gets specific. Select an app and environment to see compute usage broken down by cluster type: app clusters, worker clusters, and managed queues. If a cluster uses multiple replicas, you can drill into per-replica usage from the Replicas tooltip.
If something looks off mid-month, the hourly refresh gives you time to act before the billing cycle closes.
Switch to Managed Queues to Stop Paying for Idle Workers
Worker clusters run continuously whether there are jobs waiting or not. Managed queues scale to zero when the queue is empty.
When there is nothing to process, workers scale down to zero, and no billing occurs. When jobs arrive, workers scale back up based on queue pressure, or in other words, how many jobs are waiting and how long they have been there. You pay for the compute and queue operations that ran, not for the capacity you reserved.
Each worker runs in its own isolated Kubernetes pod. A worker configured for 512 MB gets exactly that, with nothing else sharing the allocation. One worker failing cannot crash another. Scaling adds 256 MB at a time rather than full-cluster increments, so you pay for what you actually need.
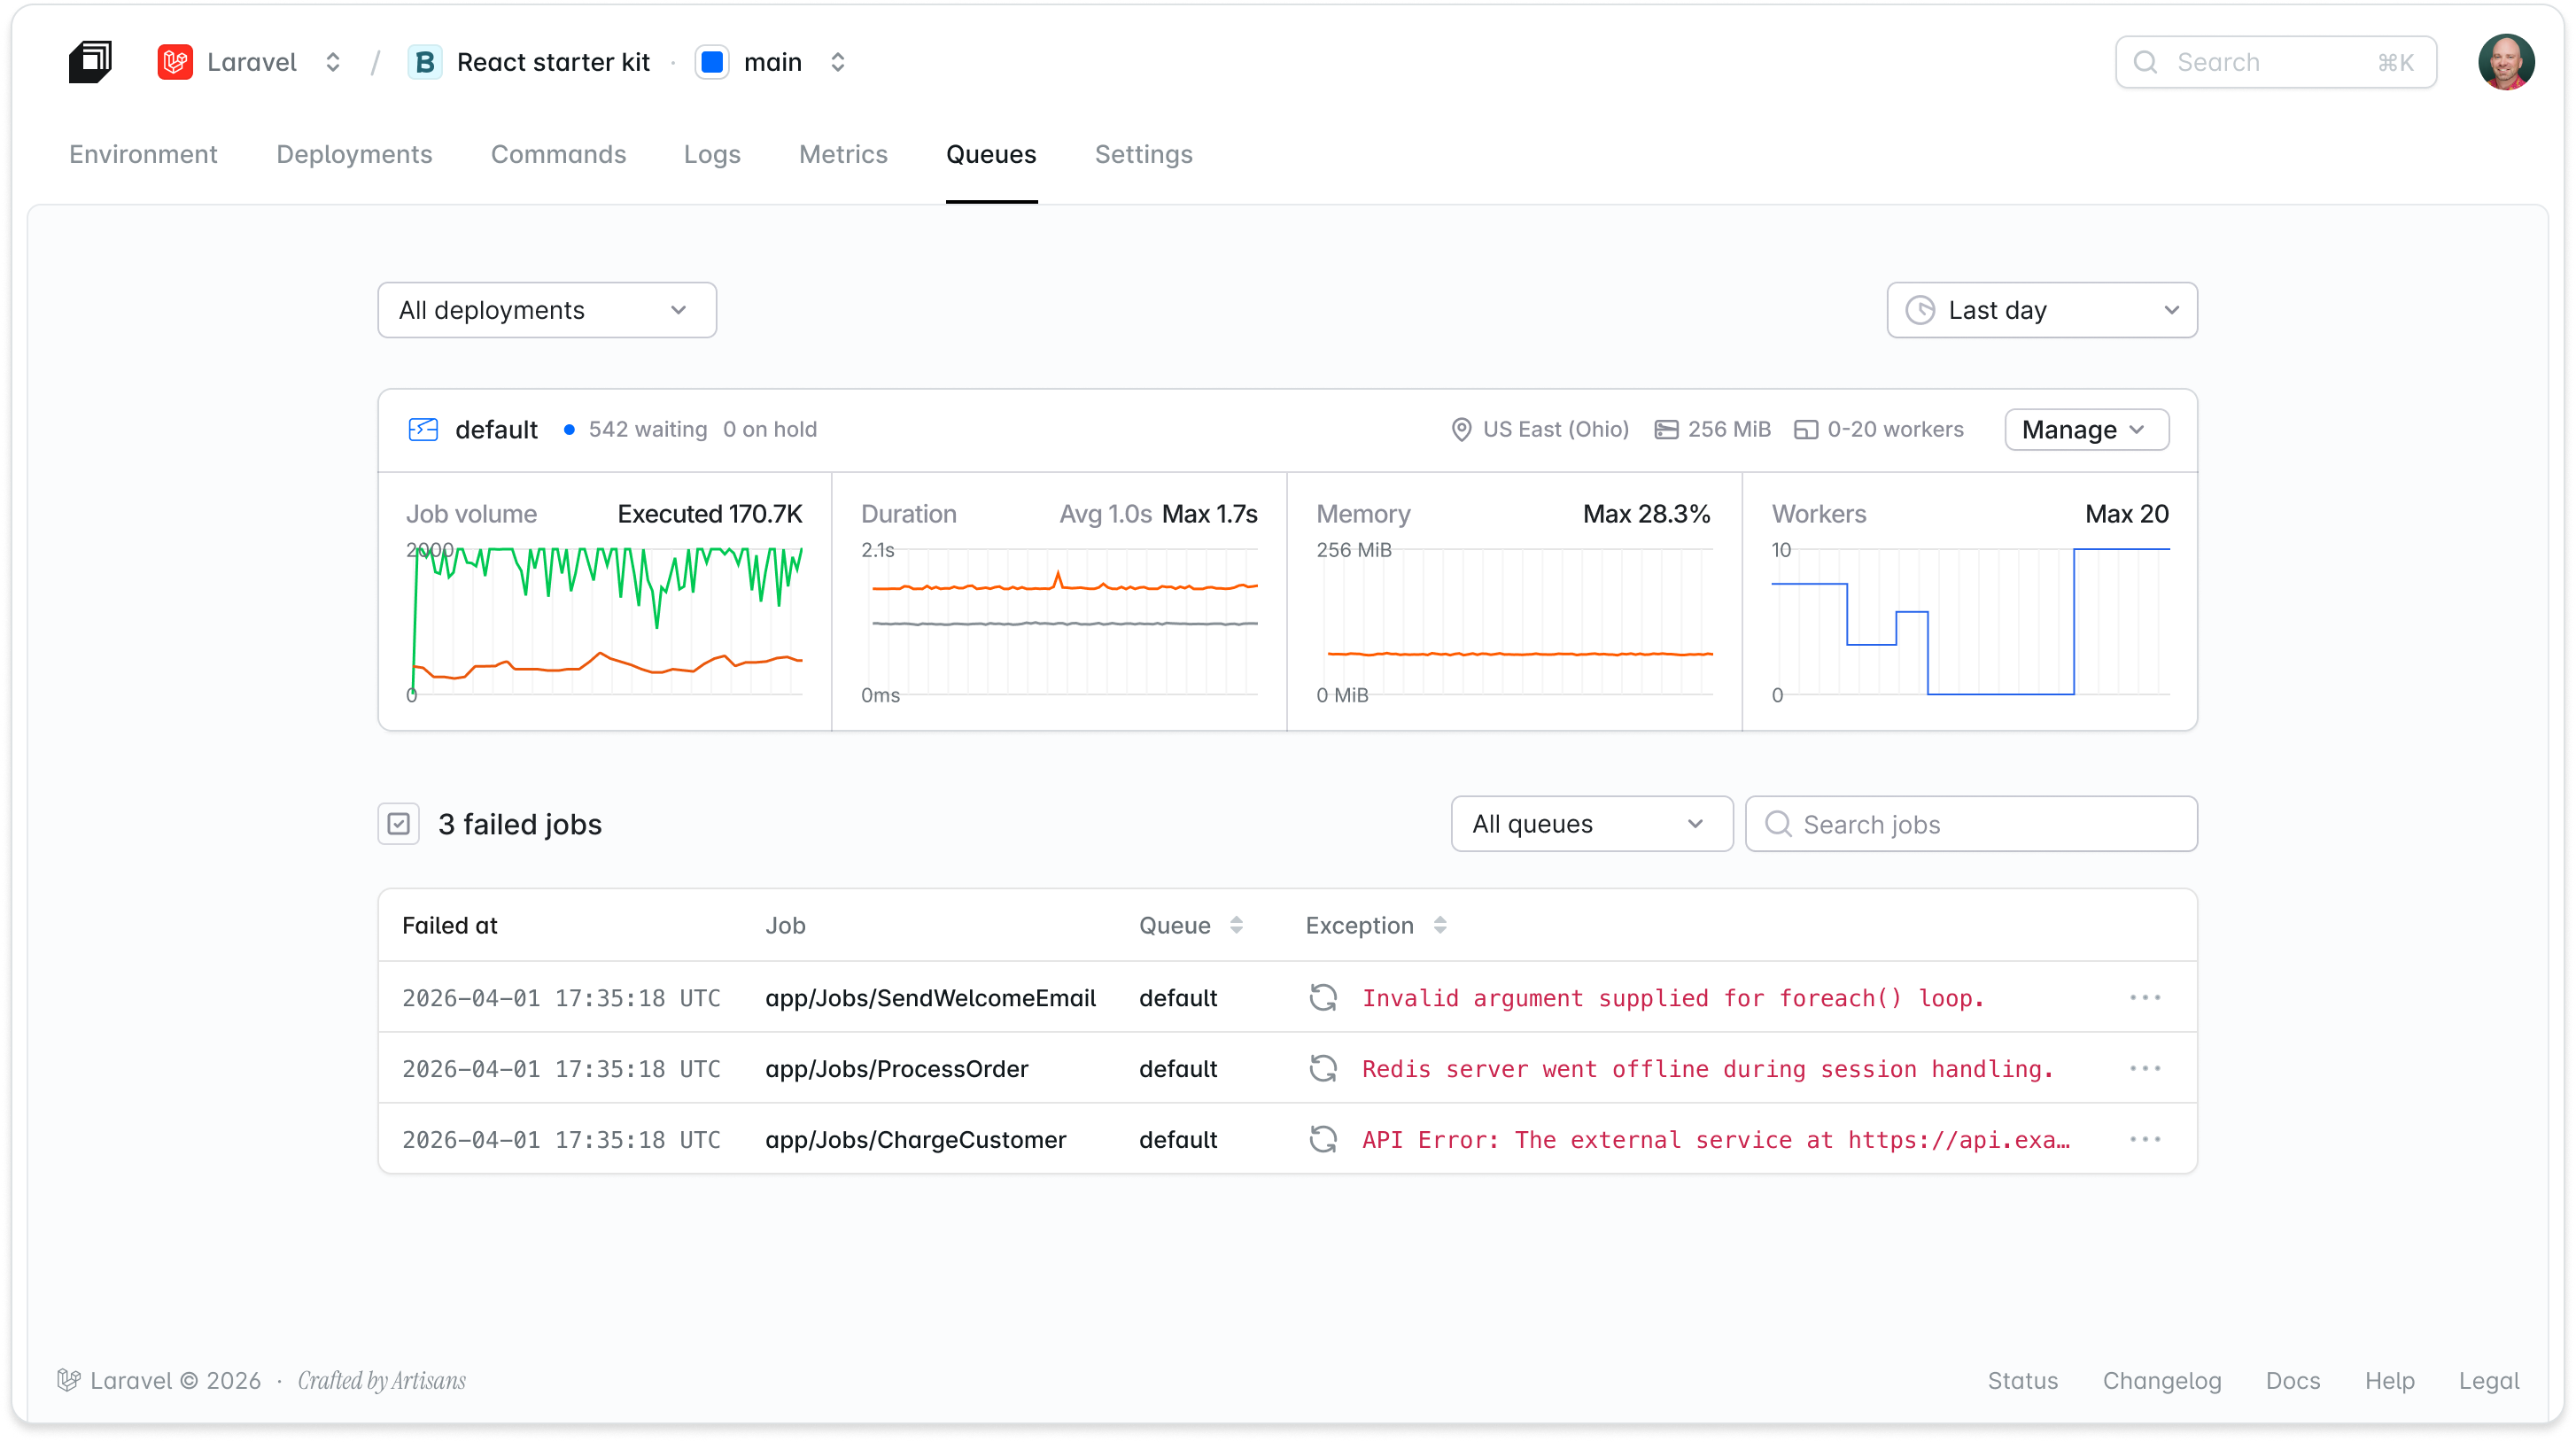 The queue dashboard shows job volume, duration, average memory, and replica counts in real time. Failed jobs surface with full detail. You can see why a job failed and retry it with one click.
Managed queues are the default recommendation for any queue workload on Laravel Cloud. Variable traffic, burst load, or multiple job types with different compute needs: all of these cost less with managed queues than with a fixed always-on worker cluster.
One practical note: start with a single managed queue. Adding multiple queues can create a situation where workers on one queue sit idle while workers spin up on another. Add a second queue only when different job types genuinely need different compute sizes.
Share Databases and Caches Across Multiple Apps
You do not need a separate database or cache instance for every application you deploy.
Database clusters and Laravel Valkey cache instances are organization-level resources on Laravel Cloud. Once you create a database cluster, you can attach it to any environment in the same region across different applications. The same applies to caches and object storage buckets.
A few common uses: a shared staging database across multiple apps, a single Valkey instance split between your main app and a background-heavy service, a storage bucket shared between a primary app and a companion API. You create the resource once and pay once, rather than provisioning and paying for duplicates.
To do this, create the resource from the Resources tab in your organization dashboard rather than from within a specific app. Resources created there are not tied to a single application: you can attach them to any environment, now or later.
When you delete an application, Laravel Cloud intentionally leaves its resources intact. They may be in use by another app. You manage them independently from the organization's Resources tab.
Next Steps
Combining these five features—scale-to-zero Flex compute, spending limits, the usage page, managed queues, and shared resources—gives you both visibility and control over your Laravel Cloud bill. To see them in action and learn how to set them up, check out this video.
Most apps run significantly cheaper once scale to zero is doing its job, and spending limits ensure the bill never goes beyond what you planned.
If you are already on Laravel Cloud, start by selecting the new scale-to-zero Flex compute and a spending limit. Both are in your dashboard and take under two minutes to configure.
If you are not on Cloud yet, the Starter plan is $5 a month with your first month on us. With scale to zero, a dormant app can often cost less than a dollar a month in compute. It is a low-risk way to see the pricing model work in your favor before you commit. See the full Cloud pricing details.